-
iTop Easy Desktop - No.1 Desktop Organizer for Windows
-
Automatically organize and customize Windows desktop. Make your messy desktop look clean and professional within seconds.

How to Remove Desktop Shortcuts? Quick Steps and Tricks for Windows Users
Struggling with clutter on your desktop? See how to remove desktop shortcuts, fix undeletable icons, and organize easily with smart tools for a neat workspace.
It’s easy for a Windows desktop to turn messy when shortcuts for apps, files, and folders start piling up. Many users look for ways to tidy their workspace, not only for a cleaner look but also to find what they need without distraction. Clearing out those unnecessary icons is a simple yet effective step. Multiple approaches to how to remove desktop shortcuts are outlined here, so it’s quick to use the method that feels most convenient.

Below are four straightforward guides that show how to remove desktop shortcuts. Each one includes steps and a matching screenshot to keep actions clear.
Option 1: Right-click and select Delete
Step 1. Right-click the shortcut you don’t need on the desktop.
Step 2. Choose Delete from the context menu.
Step 3. Confirm if prompted, and the shortcuts on your desktop will be moved to the Recycle Bin.

Option 2: Drag and drop to the Recycle Bin
Step 1. Left-click and hold the shortcut icon using your mouse.
Step 2. Drag it onto the Recycle Bin icon on the desktop.
Step 3. Release the mouse button to drop it in.

Option 3: Press DEL on the keyboard
Step 1. Left-click the shortcut to select it on your desktop.
Step 2. Press the Delete key on the keyboard directly.
Step 3. The item moves to Recycle Bin, restore from there if needed.

Option 4: Shift + DEL for multiple deletions
Step 1. Select one or several shortcuts.
Step 2. Hold Shift, then press Delete.
Step 3. Confirm to permanently remove items (no Recycle Bin). When handling many icons, this is the quickest way to learn how to remove shortcuts on desktop permanently, but use with caution and double-check selections.

Not all desktop icons behave like standard shortcuts. Items such as the Recycle Bin, This PC, or Control Panel are set as system defaults, so deleting them directly isn’t possible. Instead, Windows allows these to be removed or added through a settings panel. If you’ve ever wanted to know “how do I remove shortcuts from my desktop” when they belong to the system, follow these steps. This gives full control over how to remove desktop shortcuts that are built into the Windows system.
Step 1. Right-click on an empty space on the desktop and select Personalize.

Step 2. In the left panel, click Themes.
Step 3. Scroll down and choose Desktop icon settings under Related Settings.
Step 4. A pop-up window will appear listing icons such as Computer, Network, Recycle Bin, etc.

Step 5. Uncheck the boxes for the shortcuts you no longer want displayed. Click Apply, then OK.
Sometimes removing isn’t necessary, because you may simply want a cleaner view while keeping everything intact. Windows makes it easy to hide all shortcuts temporarily, allowing a clutter-free screen without deleting files or icons.
Step 1. Right-click any empty space on the desktop.
Step 2. Hover over View in the context menu.
Step 3. In the submenu, uncheck Show desktop icons. All icons instantly disappear, giving a blank workspace.

If you want to bring the hidden shortcuts back to the desktop, repeat the same steps and re-enable the option. It’s a quick trick for those asking how to remove desktop icons without actually deleting them. This is a good way to switch between a minimal setup and full access at any time.
1. The actual file doesn’t exist
If the shortcut points to a file or program that was already uninstalled, Windows may fail to remove the leftover icon. A quick refresh (press F5on the desktop) usually clears it. If not, restart the system and try again.
2. No permission to delete
On shared PCs or accounts with limited rights, you might see a “permission denied” message. The fix is to log in with administrator privileges or right-click the shortcut, go to Properties > Security , and adjust access settings.
3. The icon is part of the system protection
Some built-in apps like Recycle Bin or This PC are system items, not regular shortcuts. To hide these, go to Settings > Personalization > Themes > Desktop icon settings , and uncheck the ones you don’t need.
4. Shortcut is recreated automatically
Certain programs restore their shortcuts every time Windows starts. A good example is cloud storage apps. To stop this, disable the app’s “create desktop icon” option during installation or inside its settings. This helps keep the desktop clean without repeatedly learning how to delete desktop shortcuts.
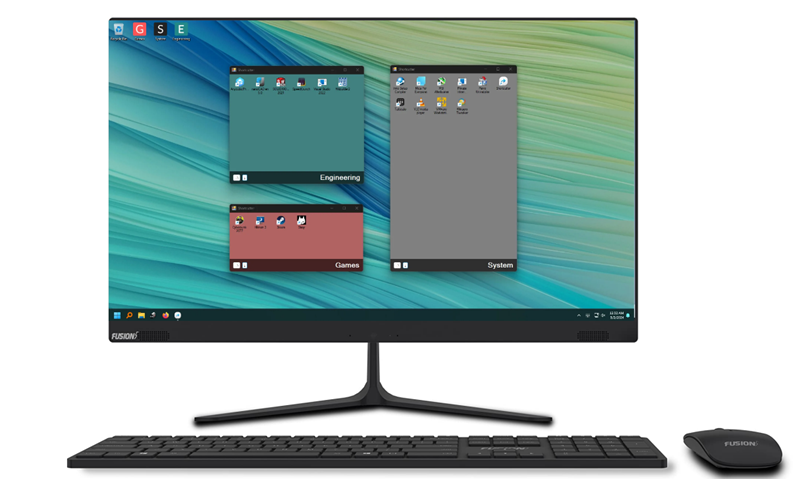
A cluttered desktop isn’t always solved by deleting icons. Sometimes, the smarter move is organizing them in a way that feels more natural and efficient. Instead of constantly learning how to delete a desktop shortcut that cannot be deleted or trying workarounds on stubborn icons, tools like iTop Easy Desktop can help.
It reshapes your workspace and lets you keep everything visible yet neatly arranged, almost like a fingertip trick that instantly restores order. This is especially useful for those looking for methods beyond the usual guides on how to remove desktop shortcuts Windows 11.

- iTop Easy Desktop - Keep Your Desktop Organized
-
- Box desktop icons to declutter your workspace
- Manage documents, games, media files, etc., at 1 click
- Add calendar, clock and other widgets to desktop
- Locate any file you want instantly with search box
Step by Step Guides to Easy Desktop Management
The following steps work if you want to know how to remove desktop shortcuts without deleting them, and they stay accessible, just more structured.
Step 1. Download and install iTop Easy Desktop.
Step 2. Launch the tool, click “Boxes” > “Add a Box” to set a new box.

Step 3. Click the Organization tab at the top to customize boxes with different rules or add a new type.

Step 4. Once the rules are set, any new icons on your desktop will be sorted into the right boxes automatically.
Explore the Full Potential of iTop Easy Desktop
Add efficiency-driven widgets to the desktop
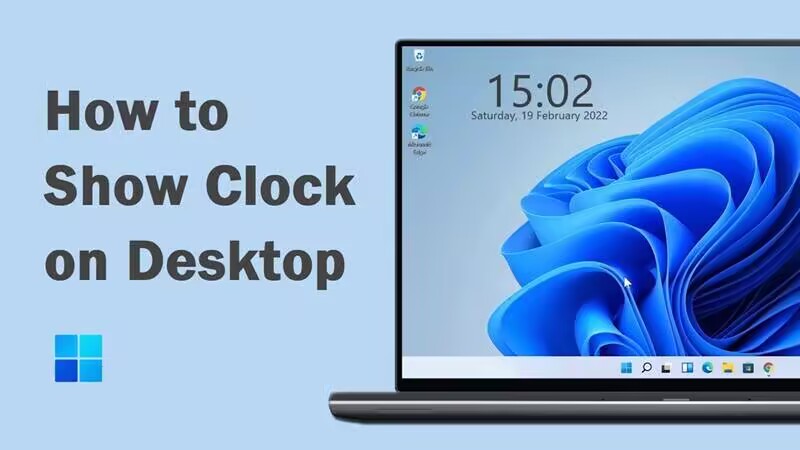
iTop Easy Desktop enables you to stay on top of daily tasks with sticky notes, clocks, and weather widgets placed right on your desktop. They keep vital info visible at all times without creating visual clutter.
Beautify your desktop with HD wallpaper
You can refresh the workspace with iTop Easy Desktop’s built-in 4K wallpapers that make your workspace feel brighter and more motivating.
Fast access to any file via the folder portal
No more wasting time clicking through endless folders. You are free to pin important folders directly to the desktop as portals and save time spent digging through File Explorer.
Search for anything with iTop AI Chatbot
Use ChatAI built into iTop Easy Desktop to get quick help for writing, summarizing, translation, quizzes, or code explanations.
Keep your personal content private
Sensitive files can be locked inside the Private Box. It’s password-protected, keeping sensitive documents, photos, or financial data safe from unwanted access.
Also Read: How to Password Protect a Folder >>
The Bottom Line
It shouldn’t be complicated to delete shortcuts from the desktop, but a tidy desktop isn’t only about learning how to remove desktop shortcuts. With iTop Easy Desktop, you can organize, protect, and even enhance the way your Windows workspace looks and feels. Instead of constantly battling clutter, the right desktop organizer makes everything stay clear, efficient, and secure.
- iTop Easy Desktop - Keep Your Desktop Organized
-
- Box desktop icons to declutter your workspace
- Manage documents, games, media files, etc., at 1 click
- Add calendar, clock and other widgets to desktop
- Locate any file you want instantly with search box