How to Password Protect a Folder on Windows Computers? 2 Free Ways
Learn how to password protect a folder with strong security. Keep your sensitive files safe from hackers and unauthorized access with this easy guide.
On a shared PC or even a personal one, not all folders are meant for everyone’s eyes. Maybe it's client contracts, private journals, or sensitive financial records. Whatever the case, locking down that data adds a much-needed layer of control. But the tough part is that getting a password on folders in Windows can be a real headache for most people. It pushes many users to either give up or download potentially dangerous tools from the web.
Need to control who gets in without a bunch of complicated steps? You've uncovered the perfect fit right here. Learn how to password protect a folder with the Windows built-in ways and a reliable third-party tool that helps you lock down your files easily and without fuss.
Instead of just blocking snoopers, learning how to password protect a folder makes your online files truly yours. Once you’ve decided to add password protection, here’s what you stand to gain:
Prevent cyberattacks. Even if your system is compromised by malware or unauthorized remote access, protected folders create an extra hurdle that blocks attackers from viewing or stealing your data.
Keep personal privacy. From personal photos to diaries or confidential correspondence, encryption ensures only you have access, no more accidental exposure.
Store sensitive information. Financial documents, contracts, and identification records stay under digital lock and key, minimizing the risk of data leaks.
Control over the folder permission. Folder-level protection means you don’t have to rely on full-device restrictions. Just secure what matters most, and let the rest remain accessible.
On Windows 10 or 11, there's a built-in encryption option you can activate in just a few steps. Below is how to create a password protected folder on Windows 10/11 with the built-in feature.
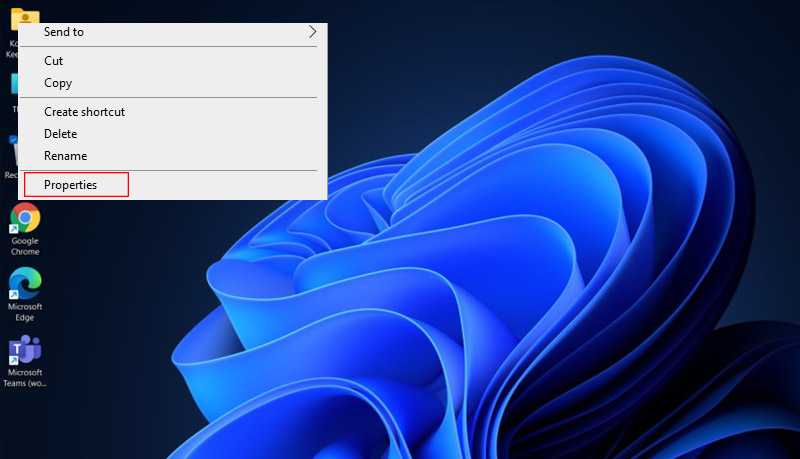
Step 1. Right-click the folder you want to secure and select Properties.
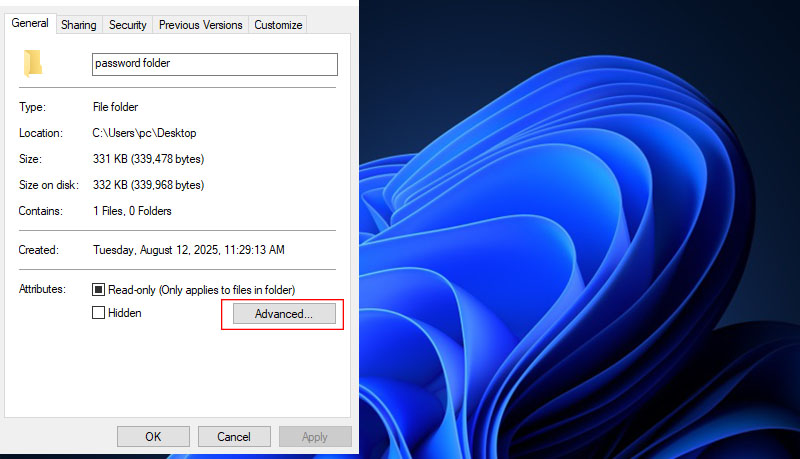
Step 2. In the window that opens, click the Advanced button under the General tab.
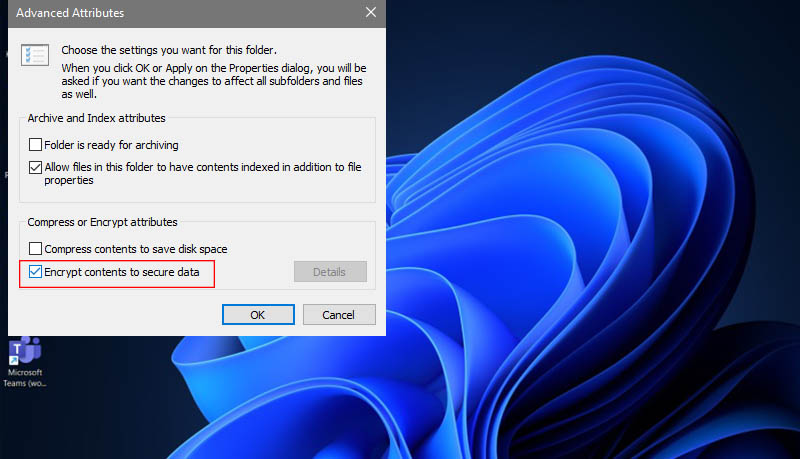
Step 3. Then, check the box labeled "Encrypt contents to secure data" and hit OK.
Step 4. Once you do the changes, click Apply. Windows will ask whether you want to encrypt this folder only or all subfolders and files under it. Make a decision and hit OK > OK again.
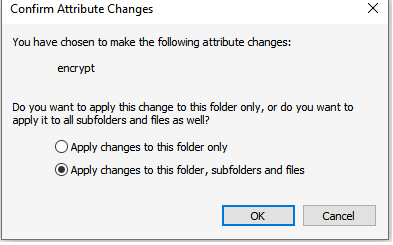
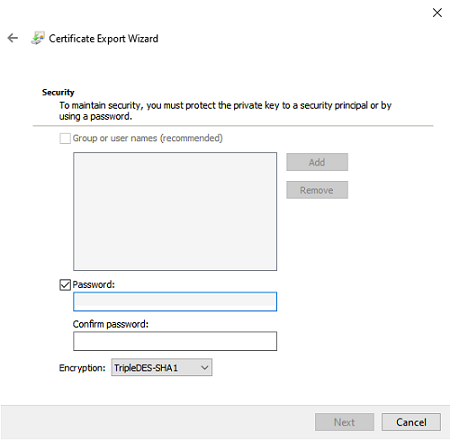
Step 5. It may ask if you want to back up the encryption. When you choose to back up now, it will continue to ask whether you want to create a password. Enter your password, select the file that you want to make the encrypted backup from, and save all changes.
Now the backup is password-protected.
Can’t Set a Password for Your Folder?
If you have set a password previously, the encryption backup and password windows may not appear. To create a new password for your protected folder, you can follow these steps:
Press Win+R on your keyboard, enter certmgr.msc, and press Enter; in the new window, go to Personal > Certificates.
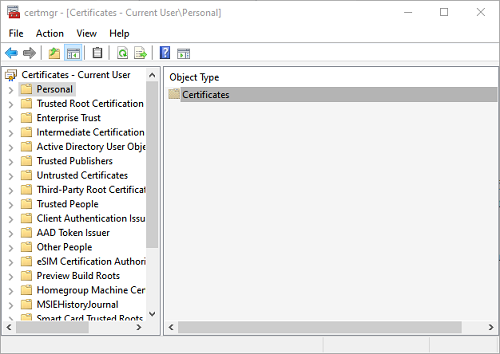
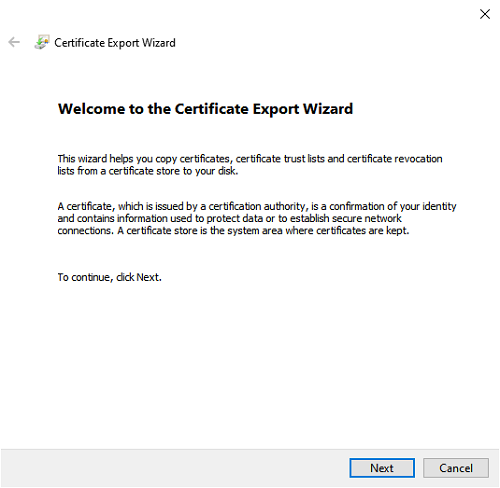
Select your Windows name under Certificates, right click on it, and select All Tasks > Export.... Now you have launched the Certificate Export Wizard. Hit Next 3 times until you see the Security password window. Just follow Step 5 to complete the protection.
While this method adds basic protection for your folder, it has one major flaw. It doesn’t require a separate password to open the folder once being linked to your Windows account. Anyone who can log into your account or boot the drive elsewhere can still access your encrypted files on Windows 10/11.
For stronger protection, tools like iTop Easy Desktop recommended below, offer real folder locking with password prompts. It’s a better solution if you’re working on a shared computer or need to keep confidential files truly private.
If you’ve been wondering how to password protect a folder with enhanced security, there’s good news: you don’t have to be a tech wizard. While traditional methods like Windows’ built-in encryption can work, they often come with limitations. That’s why tools like iTop Easy Desktop are worth a closer look. They raise the bar for privacy and convenience.
Lock sensitive folders in iTop Easy Desktop’s Private Box, a customizable, password-sealed vault you can hide or reveal with a quick double-click. You can also create secure folder portals and restore everything in seconds, right where you left it. See the details.
Password Protect Any Folder in Private Box
With iTop Easy Desktop, you can drop any sensitive folder into its secure “Private Box” and seal it with a password. This isn’t just hiding files, but locking them in a digital vault that only you can open.
Customize Private Box in Your Way
Your Private Box doesn’t have to be a bland window. You can tweak its appearance, rearrange its layout, and set up quick actions so that your workspace feels natural and personal.
Double-Click to Hide Anything on the Screen
One quick double-click, and the folder or even your entire desktop vanishes from sight. It’s perfect for those moments when someone walks by unexpectedly.
Create Your Folder Portal with Ease
Instead of digging through directories, iTop lets you create a direct portal to your folder. It’s like having a shortcut that’s both handy and protected.
Quickly Unblock and Restore the Folder
When you need your files, you can unlock them in seconds. Just double-click the box, enter your password, and your folder pops back exactly where you left it.
How to Password Protect a Folder in iTop Easy Desktop
Curious about how to make folder password protected with iTop Easy Desktop? The process is refreshingly straightforward. Here’s how to password protect a folder in Windows using this desktop organizer.
Step 1. Download and install iTop Easy Desktop. Follow the on-screen instructions to get it set up.
Step 2. Open iTop Easy Desktop on your PC, click Boxes > Add a Box. Select Create a Private Box. Set your password, this is how to set password to folder without fuss.
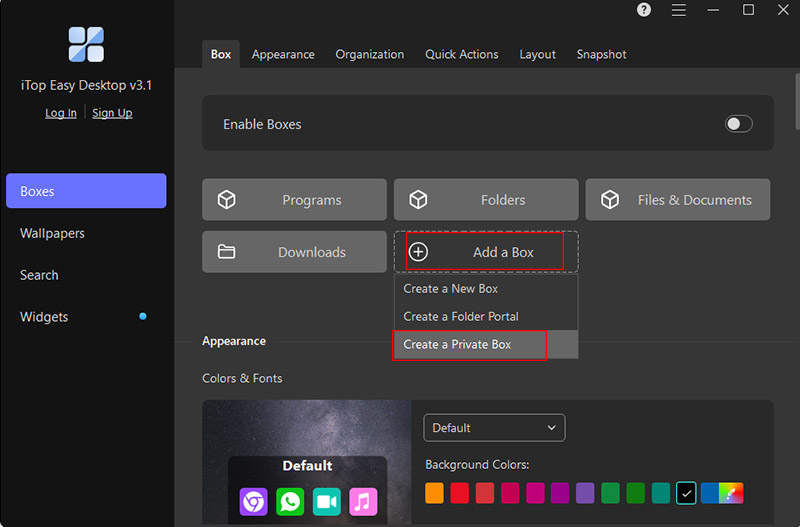
Step 3. Name your folder and click Create Now. Place your target folder on the desktop for easy access. Then, simply drag it into your Private Box. Your folder is now locked and hidden until you enter the correct password.
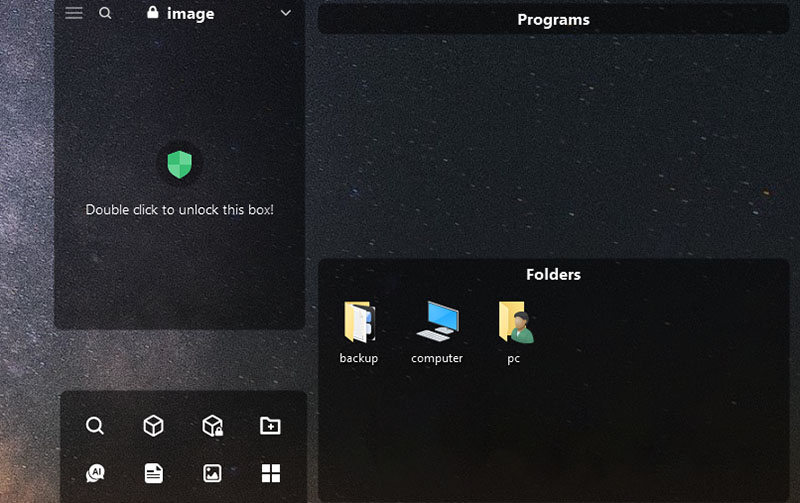
To learn how to put a password on a folder further, the following tips for file hiding and protection are helpful.
1. How to hide a folder on Windows?
Right-click the folder, select Properties, and under the General tab, check the Hidden box. Then, go to File Explorer Options and ensure "Don't show hidden files" is selected. This hides the folder from casual view, and you don’t need to learn how to make a password protected folder.
2. How to make a folder invisible on Windows?
To go further, rename the folder with a blank character (hold Altand type 255), then right-click > Properties > Customize > Change Icon, and choose an invisible icon.
3. How to password protect any file on Windows?
For PDFs, open in Adobe Acrobat or print via Microsoft Print to PDF and apply password protection under security settings.
For Excel files, use File > Info > Protect Workbook > Encrypt with Password.
ZIP files can be protected using Windows compression tools. But for stronger encryption, programs like iTop Easy Desktop offer easier folder-level password protection and a privacy-safe desktop environment.
4. Can I use 7-Zip or WinRAR to protect a folder with a password?
Yes, both tools allow you to let Windows password-protect folder by archiving folders with strong AES encryption. Just right-click > Add to archive > set a password, and you're done.
The Bottom Line
Picking up on how to password protect a folder isn’t just about keeping files safe. It’s about peace of mind. While there are many ways to lock down your data, iTop Easy Desktop makes the process simpler, faster, and more secure. Its Private Box, customization, and one-click hiding give you more control over your privacy. If you’ve been looking for a no-hassle way to master how to password protect a folder, give iTop Easy Desktop a try and experience the difference.


