-
iTop Easy Desktop - No.1 Desktop Organizer for Windows
-
Automatically organize and customize Windows desktop. Make your messy desktop look clean and professional within seconds.

How to Organize Desktop Icons in Windows [Best Ways & Tips]
Learn how to organize desktop icons in Windows 11/10 for a clutter-free workspace. Discover smart tips and the best software to organize icons easily.
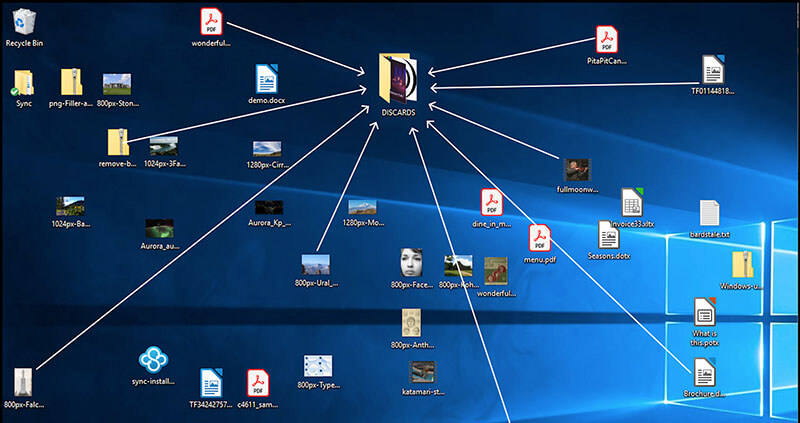
Icons scattered all over your desktop? Struggling to find the right shortcut among the clutter? This is the time you really need to organize desktop icons to boost efficiency and keep your workspace tidy. With proper icon management, you can greatly save time, improve focus, and make your desktop look visually appealing. If you don't know where to begin, worry not; this guide is the right place to land! We will introduce the best methods to help you get how to organize desktop icons on Windows 10/11 in simple steps!

Windows provides several built-in personalization features, and you can organize desktop icons with a few clicks. Here's how to organize desktop icons on Windows 10/11.
1. Auto Arrange Desktop Icons
Right-click on an empty desktop space. Select View > Auto arrange icons. Windows will automatically align icons into a grid. This keeps them evenly spaced and prevents overlap, but you won't be able to freely drag them around.

2. Sort Icons by Name, Size, Item Type, or Date Modified
Right-click on the desktop. Select Sort by and choose your preferred option. You can then organize icons alphabetically, by file size, by type (app, folder, shortcut), or by the last date modified. This is rather useful when you have many files and want them grouped logically.

3. Add Icons to the Taskbar
Drag frequently used apps from the desktop onto the Taskbar for quick access. This creates a shortcut that stays visible at the bottom of your screen, giving you one-click access without cluttering your desktop. Right click the icon and select Pin to taskbar. Also, you can directly drag and drop the icon to taskbar.

4. Show or Hide Desktop Icons
If you prefer a clean workspace, right-click on the desktop, go to View, and toggle Show desktop icons. When disabled, all icons are hidden, but they are not deleted; you can bring them back anytime.

5. Manually Arrange Desktop Icons by Drag-and-Drop
Simply click and drag icons to place them wherever you want on the desktop. This method gives you the freedom to create a custom layout for grouping apps or shortcuts.

While the built-in features in Windows allow you to organize desktop icons, they are too limited, with very few customization options. Not to mention the effort for the manual drag-and-drop method. This is the time iTop Easy Desktop comes in, a powerful desktop organizer for Windows that offers more control, flexibility, and style for managing your workspace.
How to Organize Your Desktop Icons with iTop Easy Desktop
Step 1. Free download and install iTop Easy Desktop on your Windows PC.
Step 2. Go to the Box tab and toggle Enable Boxes. It will automatically organize desktop icons into 4 boxes, Programs, Folders, Files & Documents and Downloads.

Step 3. Click on any box to customize it. You can rename the title, change background color, set transparency and adjust font style/size etc. Click Save to apply the changes. Or, Click Delete to remove the box.

Step 4. Click the Add a box to add a new box. Create special types, like a Folder Portal or Private Box, for extra organization and privacy.

Step 5. Now, give a title of the box and customize its appearance. Click Create Now.

Step 6. Go to Organization tab to set box rules as you like. Click + button to add one or multiple types of icons into the box for auto arrangement. Besides the given types, you can add a new type. Alternatively, you can manually drag and drop desktop icons into the corresponding box.

Why iTop Easy Desktop Perfect for Organizing Dekstop Icons
iTop Easy Desktop has a set of features to organize and clean up your desktop, helping you arrange icons, files, folder and more in a simple way.
Create Boxes in Different Types to Sort Icons: iTop Easy Desktop allows you to create multiple labeled boxes to organize desktop icons by category (apps, folders, images, compressed files, etc.), so you can locate your files and icons effortlessly.
Customize the Appearance of Boxes: Feel free to customize your desktop with iTop Easy Desktop. Change the box colors, adjust transparency, and resize areas for different icon groups. Just create a unique look that matches your style instantly now!
Quick Show/Hide Actions to Access Boxes: iTop Easy Desktop lets you temporarily hide or show icons, files, and boxes on your Windows desktop with a single click. You can hide all icons for a clean, distraction-free workspace, then instantly reveal them when needed. This feature is rather useful during meetings, presentations, or recording your screen.
Add Widgets to Desktop in One Click: iTop Easy Desktop offers six handy widgets: Schedule, iNotes, Clock, Fancy Taskbar, Weather, and Quick Tools. You can add them to your desktop as essential tools and information within easy reach without cluttering your workspace.

- iTop Easy Desktop - Keep Your Desktop Organized
-
- Box desktop icons to declutter your workspace
- Manage documents, games, media files, etc., at 1 click
- Add calendar, clock and other widgets to desktop
- Locate any file you want instantly with search box
A reliable desktop organizer offers an efficiently way to make your desktop look clean. But that's not it; there are more useful ways that can help you organize desktop icons for a more functional space.
Categorize Icons with Folders: Combine related files or apps into folders; this is the No.1 rule to follow when you organize desktop icons.
Group Related Icons: Keep work apps together, entertainment shortcuts in another area, and utilities in their own group.
Customize Default Desktop Icons: Windows includes the Recycle Bin icon on the desktop by default. You can change/customize icons for This PC, Recycle Bin, and folders to make them easier to identify at a glance.
Describe Icons with Special Names: Use clear and descriptive labels like “Work_Projects” or “Daily_Tools” to describe your files/icons. So you can quickly find what you need.
Design Creative Layout for Icons: Arrange your icons and files in grids, shapes, or color-coded zones to make your desktop not only organized but visually appealing.
If you are a Mac user, it's also important to know how to organize desktop icons on your device for better productivity. macOS offers several built-in options that allow you to do so:
Organize Items into Folders
Select multiple files or folders, Control-click one of them, and choose New Folder with Selection. This instantly reduces clutter and makes it so much faster to locate related files.

Use Stacks for Automatic Sorting
Turn on Stacks to automatically group files by kind, date, or tags. For example, all images go into one stack, documents in another, to keep order without constant manual work.

Arrange Icons by Criteria
From View > Sort By, you can sort icons by name, kind, date added, size, or tags for a consistent structure.

Manual Arrangement & Clean Up
Keep Sort By set to None if you want total control over placement. Use Clean Up By for a quick alignment when needed.

Customize Icon Appearance
In Show View Options, adjust icon size, grid spacing, and text labels to match your style.

How to organize my desktop icons? Windows has native features to organize desktop icons, while using a third-party tool, for example iTop Easy Desktop, you can enjoy a smarter, faster way to keep your desktop clean and organized. It’s the most powerful desktop organizer for Windows to boost your productivity. Just download iTop Easy Desktop today and design your desktop now.
- iTop Easy Desktop - Keep Your Desktop Organized
-
- Box desktop icons to declutter your workspace
- Manage documents, games, media files, etc., at 1 click
- Add calendar, clock and other widgets to desktop
- Locate any file you want instantly with search box