-
iTop Easy Desktop - No.1 Desktop Organizer for Windows
-
Automatically organize and customize Windows desktop. Make your messy desktop look clean and professional within seconds.

How to Add Widgets to Desktop for Windows and Mac: 3 Ways
How to add widgets to desktop for Windows and Mac? Check out the 3 useful methods to enhance your productivity and personalize your workspace efficiently.
In today's fast-paced digital world, staying organized is staying productive. Desktop widgets like weather updates, calendars, notes, and system monitors are handy tools here; they allow you to glance at essential information without opening apps.

With these useful widgets, you can personalize your workspace and boost efficiency hassle-free. So, how to add widgets to desktop? If you just keep reading, there are three effective methods catering to Windows and Mac users. Let’s dive right in!
If you are looking for a versatile solution beyond built-in features, iTop Easy Desktop stands out as a solid choice. Compatible with Windows 11/10/8/7, the desktop organizer offers seven built-in widgets, providing convenience for quick task management, reminders, time tracking, and more. First off, let’s see how to add widgets to desktop windows 11 with it easily.

- iTop Easy Desktop - Keep Your Desktop Organized
-
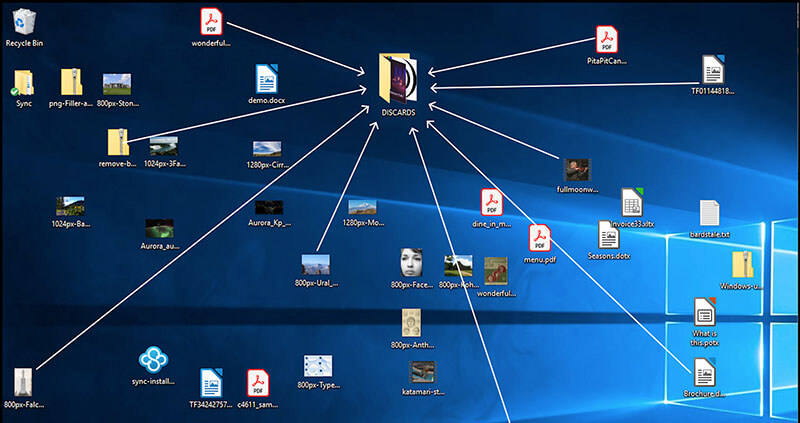
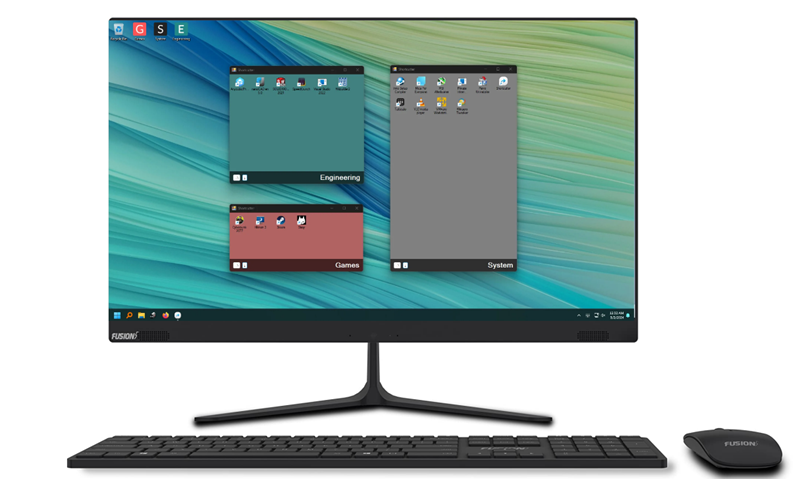
- Box desktop icons to declutter your workspace
- Manage documents, games, media files, etc., at 1 click
- Add calendar, clock and other widgets to desktop
- Locate any file you want instantly with search box
Quick Guide to Add Powerful Widgets to Windows Desktop
Step 1. Free download and install iTop Easy Desktop on your PC.
Launch the app and navigate to the "Widgets" section in the left menu. Here you can enable the 7 widgets as you see fit.

Step 2. For instance, you may enable the Schedule widget and add an event to it.

Step 3. In the Schedule interface, click on the hamburger icon in the top left to set your preferences: View, Time, Appearance, etc.

Step 4. You can also add Quick Tools to your desktop for easy shortcuts. After enabling it, click on the Settings icon to adjust the appearance, like background color and Transparency.

Step 5. Now the Quick Tools will stay on your desktop. You create a box by clicking on the icon. This small panel allows you to access any tool you want.

Step 6. When you enable all the widgets, they will appear on your desktop in an organized way.

What Widgets Does iTop Easy Desktop Have?
iTop Easy Desktop's widgets cater to diverse needs. Here’s an overview.
Schedule: Great for professionals to manage tasks and events for seamless daily planning.
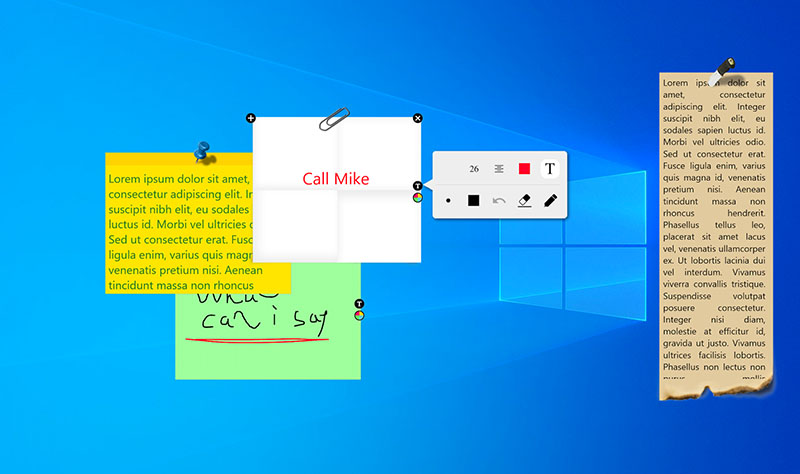
iNotes: Convenient for students to jot quick reminders or capture ideas instantly.
Clock: Best for remote workers to track time zones and alarms, keeping them synchronized globally.
Fancy Taskbar: Ideal for multitaskers to enhance navigation with a customizable taskbar to showcase wallpapers.
Weather: Perfect for commuters to access local forecasts and alerts, aiding travel and outfit planning.
Quick Tools: Great for everyday users to quickly access utilities.
iPomodoro: Convenient for freelancers to boost focus with customizable Pomodoro sessions and prevent burnout.
Why iTop Easy Desktop Is Your First Pick
Now you have learned how to add widgets to desktop with iTops Easy Desktop. The desktop organizer is outstanding for many reasons, and here are the major ones:
One-click to add on: Enabled with a single toggle, simplifying the setup process for users of all levels.
Easy to place by dragging: Effortlessly position widgets on the desktop by dragging, with flexible layout design.
Custom outlook settings: Adjust colors, transparency, fonts, and sizes to personalize widgets; blend seamlessly with your desktop aesthetic.
Additional features: Support file organization into boxes, wallpapers for visual flair, quick search for faster file access, and an AI chatbot (ChatAI) for instant queries and translations.
For Windows 11 users, the built-in Widgets board offers a native solution. You can add widgets like news, stocks, weather, and calendar to your desktop as per your needs. First things first, let’s see how to add widgets to desktop windows 11.
Step-by-Step Guide to Put Widgets on Windows 11 Desktop
Step 1. Press Windows + W or click the Widgets icon on the taskbar to open the Widget board.

Step 2. Click your profile picture, choose Widget settings, then click the + button to add the widgets you want.

Step 3. Rearrange by dragging widgets to a new location, or remove them by selecting the “⋯ “menu and clicking Remove widget.

Step 4. Adjust sizes or customize details, like weather location or stock list, using the “⋯ “menu. Select the desired options here.

What Are the Limitations of Windows 11 Built-in Widgets?
That’s how to put widgets on desktop windows 11. However, the feature is rather limited for the reasons below:
For Windows 11 only; users on older versions like Windows 10 can't access it natively.
Limited to basics like news and sport; no advanced options like Pomodoro timers.
Minimal changes to size or appearance with limited personalization options.
Widgets are not always on the desktop; manual opening is required.
Sign-in is mandatory; this may concern privacy-focused users.
The native feature is quite basic compared to iTop Easy Desktop. The desktop organizer supports all Windows OS with more widgets and drag-and-drop placement. For those who want to know how to add widgets to Windows desktop easily, iTop Easy Desktop is more convenient, effective, and versatile for all-around use.
With the steps above, you should know how to add widgets to Microsoft desktop. So what about Mac? Similarly, macOS offers a built-in widget system starting from Sonoma, which allows interactive widgets on the desktop for information like reminders or battery status.
A Full Guide on How to Add Widgets to Desktop for macOS Devices:
Step 1. Open Notification Center by clicking the date and time in the menu bar, which is located in the top right. Click Edit Widgets to open the panel.

Step 2. Then browse categories or use the search bar to find the app you want to add. Click the Add button to add a widget, or drag it directly to the desktop or Notification Center.

Step 3. To rearrange or resize, drag widgets to new positions or Control-click to select a different size. You can freely customize displayed widgets, such as city, calendar, or reminders list.

Step 4. Go to System Settings > Desktop & Dock > Widgets for advanced controls. Here, you can enable iPhone widgets, choose where widgets appear, and adjust the widget style between monochrome, automatic, or full-color themes.

More Third-Party Tools for Desktop Widgets
If you are looking for more options, here are some popular third-party apps to consider on Mac.
Widgetter: A customizable home screen builder with upscale widgets for weather, calendar, and more.
WidgetWall: Provide an ever-growing suite of widgets like clocks and calculators, with stickers for fun personalization.
Fantastical: Focus on calendar widgets with natural language input, ideal for scheduling but limited to time-related features.
Compared to built-in widgets, third-party tools offer more variety and customization. But advanced features may require purchases; built-in features are seamless and free, but less diverse.
If you have read this far, now you should know how to add widgets to desktop on Windows and macOS. Before you go, here are a few tips to enhance productivity.
Select widgets based on your needs, like weather for travelers or notes for writers.
Customize sizes and positions for optimal workflow and aesthetics.
Group related widgets together, update them regularly, and avoid cluttering.
Use transparency for a clean look, and integrate with themes for visual appeal.
Q: Why do my widgets appear on the desktop?
A: This could stem from software glitches, an outdated OS, or disabled features. You can restart your device or check settings to enable them.
Q: How to remove a widget from my desktop?
A: Right-click the widget and select "Remove" or drag it off the screen, depending on your OS or tool.
Q: How to organize multiple widgets on the desktop for a clean performance?
A: It’s recommended to group them by function with grids; you can also consider organizers like iTop Easy Desktop’s built-in widgets and declutter the desktop at the same time.
Conclusion
How to add widgets to desktop? Just go with the step-by-step instructions for Windows and macOS. While Windows 11 and macOS provide built-in tools, these features are rather basic. As you can see, iTop Easy Desktop stands out as the most versatile solution for Windows users. With better customization, visibility, and productivity enhancements, it simply makes your desktop both functional and stylish. Get it and boost efficiency today!
- iTop Easy Desktop - Keep Your Desktop Organized
-
- Box desktop icons to declutter your workspace
- Manage documents, games, media files, etc., at 1 click
- Add calendar, clock and other widgets to desktop
- Locate any file you want instantly with search box