-
iTop Easy Desktop - No.1 Desktop Organizer for Windows
-
Automatically organize and customize Windows desktop. Make your messy desktop look clean and professional within seconds.

How to Change Time Zone on Windows 11 [All Possible Ways]
How to change time zone on Windows 11? This blog lists all possible methods with step-by-step guides, plus the best tool for efficient desktop time tracking!
A time zone is a region of the Earth, and it observes a uniform standard time. Time zones are crucial because they not only help coordinate activities across different geographical areas but also ensure accurate scheduling for travel, business meetings, and global communications.
Today, many computer operating systems support working with local times based on various time zones and you can also change time zones manually. This blog will introduce how to change time zone on Windows 11 via various methods, with step-by-step instructions specifically.

There are multiple reasons to change time zone on Windows 11, from business to personal purposes. Check some common factors below:
Adjust the system clock for travelling or relocation. This is to ensure calendars, notifications, and appointments show the correct local time.
Temporarily switching time zones to avoid meeting-time errors. So you can better coordinate with international clients or remote teams.
Fix incorrect time displays caused by setup issues, software glitches, or outdated settings.
Test apps or tools, capture a screenshot when you need time-sensitive data or visuals.
Explore different time zones for personal needs. For instance, tracking global events or managing schedules across regions.
Windows 11 has the built-in options to change Time Zone automatically or manually in Settings. Additionally, you can try some other working ways.
How to Set Time Zone Automatically on Windows 11 via Settings
The simplest way to change time zones is to use the automatic detection. Here's how.
Step 1. Open Settings by pressing Win + I.
Step 2. Navigate to Time & language > Date & time.
Step 3. Toggle on "Set time zone automatically". This uses your location services to detect and apply the correct time zone.

How to Manually Change Time Zone on Windows 11 via Settings
If you want to change your time zone precisely, here’s how to do it manually.
Step 1. Follow this path: Settings > Time & language > Date & time. Turn off "Set time zone automatically".
Step 2. From the "Time zone" dropdown, select your desired zone, and the changes apply immediately.

How to Change Time Zone on Windows 11 with Control Panel
The classic Control Panel is another reliable option for time zone settings. Here’s how to change your time zone on Windows 11 using the feature easily.
Step 1. Navigate to the Control Panel from the Start menu and open it. Click "Clock and Region" > "Date and Time".
Step 2. In the newly opened Date and Time window, click "Change time zone".

Step 3. Click on the drop-down menu under Time zone. Select your desired time zone from the list. Click OK to save the change.

How to Change Time Zone on Windows 11 with Command Prompt
For tech-savvy users who want to know how to set time zone on Windows 11 via command lines, check out the steps below.
Step 1: Open the Start Menu, search for Command Prompt, and choose Run as administrator.
Step 2: Enter tzutil /l to display a full list of supported time zones.
Step 3: To apply a new time zone, use tzutil /s "Pacific Standard Time" command. Substitute the name with the time zone you want to set.

How to Change Time Zone on Windows 11 with PowerShell
PowerShell offers similar functionality to set your timezone. Here’s how to adjust time zone in Windows 11 using the feature.
Step 1. Search and locate the PowerShell feature in the Start menu. Open PowerShell as administrator.
Step 2. Type “Get-TimeZone” to view current settings. Or use “Get-TimeZone -ListAvailable” to view the list of supported time zones.

Step 3. Use the code “Set-TimeZone -Id "YourTimeZoneId." For instance, Set-TimeZone Name - "Line Islands Standard Time.

How to Adjust Time Zone on Windows 11 with Registry Editor
For advanced users, Registry Editor is where you can apply changes directly. But just make sure to back up your Registry first and use it carefully to avoid system issues.
Step 1. Use the hotkey: Win + R, type regedit, and hit Enter to enter your Registry Editor.
Step 2. Navigate to HKEY_LOCAL_MACHINE\SYSTEM\CurrentControlSet\Control\TimeZoneInformation.
Step 3. Double-click "TimeZoneKeyName" and set it to your desired zone (e.g., "Indian Standard Time"). Restart your PC for changes to take effect.

It is quite easy to get an answer of “how to change time zone on Windows 10”. But unfortunately, you might find you can not change the time zone in Windows 11 sometimes, for instance, the time zone settings suddenly greyed out. If you have encountered the not working issue, try troubleshooting tips here.
Enable Location Services: Go to Settings > Privacy & security > Location, and toggle on "Location services" and "Let apps access your location." Restart your PC if needed.
Enable Automatic Time Zone via Registry Editor: If the auto feature is greyed out, press Win + R, type "regedit," and navigate to HKEY_LOCAL_MACHINE\SYSTEM\CurrentControlSet\Services\tzautoupdate. Double-click "Start," set "Start" to 2 (for automatic), and restart your PC.
Repair Corrupt System Files: Open Command Prompt as administrator, run "sfc /scannow" to scan and fix files.
Check for Windows Updates: Go to Settings > Windows Update to install any available updates and restart.
Disable Third-Party Antivirus Temporarily: Pause or disable your antivirus, then try changing the time zone again. Re-enable it afterward.
Reset Date & Time Settings: In Settings > Time & language > Date & time, toggle off and on "Set time automatically" and "Set time zone automatically" to refresh the options.
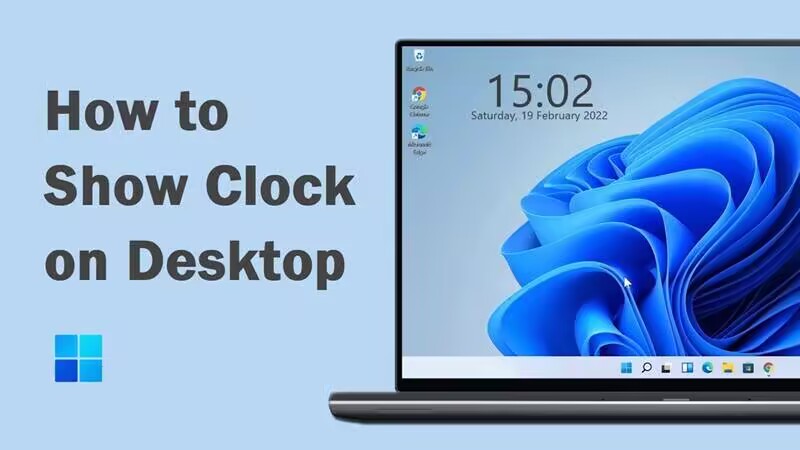
No need to waste too much to set time zone for time tracking. Putting a clock on your desktop is a great strategy to help you stick to the schedule with an exact time in any location and enhance the efficiency.
iTop Easy Desktop, a versatile desktop organizer and customizer for PC, provides a clock widget that lets you display the clock directly on your Windows 11 desktop. The clock widget presents the local time at 24 or 12 hours time format and show the date and second as you set. You can also adjust the clock size and appearance for a better look.
Now, let's see how to enable it easily.
Step 1. Free download the iTop Easy Desktop. Install it on your Windows PC.
Step 2. Launch it. Go to Widgets > Clock. Toggle on the feature to enable it.
Step 3. Click the gear icon to open settings and customize the parameters.

Step 4. Now you will see a clock on your desktop that is more visible than the native one.
iTop Easy Desktop is more powerful than you imagine; it’s a professional desktop organizer for Windows designed to boost productivity. Check out its features that can make your desktop look clean and cool.
Custom boxes for organization: Automatically sort icons, files, and folders into personalized boxes with options for colors, transparency, etc.
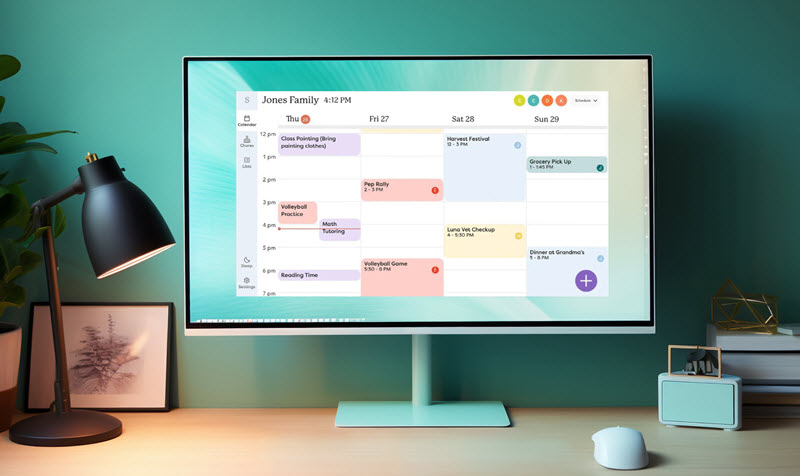
Schedule, clock, and other widgets: Provide Useful Widgets for productivity. For instance, Schedule for tasks, Weather, iNotes for reminders, and iPomodoro for focus sessions.
Wallpapers for aesthetic desktop: Choose from dynamic videos, static images, or upload your own to personalize your setup.

- iTop Easy Desktop - Keep Your Desktop Organized
-
- Box desktop icons to declutter your workspace
- Manage documents, games, media files, etc., at 1 click
- Add calendar, clock and other widgets to desktop
- Locate any file you want instantly with search box
Conclusion
How to change time zone on Windows 11? The process can be pretty straightforward as long as you follow the guides above! If you encounter issues, there are also simple fixes that are ready to help. For those who are looking for a more convenient time tracking, try iTop Easy Desktop's clock widget to display time directly on your desktop. You can also add a schedule widget to view your tasks, organize your desktop, and enhance overall productivity with it. The software is entirely free to use. Get it to enjoy a more organized and effective workspace now!