iTop VPN offers 3200+ VPN servers in 100+ locations worldwide to help you access various sites privately and safely, along with dedicated IP, dynamic and static IP, and Double VPN.
Learn how to deactivate FB Messenger in 2025 with this simple guide. Get step-by-step instructions for iPhone, Android, and PC plus privacy tips.
Are you tired of constantly receiving Facebook notifications in which you are not even interested in? Are you concerned about your own privacy such as your chat history on Facebook being monitored? Or do you just simply want to take a break from social media? There are always different reasons for different people. And that’s why many users try to take control of their digital lives. Stepping away from Facebook Messenger is one of the ways. In today’s step-by-step guide, we’ll show you exactly how to deactivate FB Messenger on your phone or computer in 2025.

Speaking of how to deactivate FB Messenger isn’t just about stepping away from a messaging app; it’s about taking charge of how you engage with others, protect your online activity, and manage your time. Here are some of the most common reasons users choose to temporarily deactivate Facebook Messenger:

Reduce distractions: Continuous pings from messages and notifications can significantly disrupt your focus, hindering both productivity and creativity.
Protect privacy: With rising apprehensions about Facebook's data-sharing policies, many users are choosing to deactivate Messenger as a proactive step towards reducing their digital footprint and safeguarding sensitive information.
Digital detox: Taking a break from social apps can nurture mental well-being, allowing you to alleviate social media dependency and cultivate a healthier balance between your digital and real-world interactions.
Establish boundaries: For those juggling both personal and professional communications on one platform, if they know how to deactivate FB Messenger which can help establish a clear division, ensuring better organization and peace of mind.
Deactivation isn’t permanent. It’s a flexible option, letting you take a temporary break with the ability to reactivate whenever you're ready.
First of all, you need to know that before you deactivate Messenger, you must first deactivate your Facebook account. Even after deactivation, your messages and chat history will still be visible to others. The good news? You can reactivate Messenger anytime by simply logging back in. Okay, we’ll explain how can I deactivate Facebook Messenger for both mobile devices and PCs.
No matter you want to find out how to deactivate Facebook Messenger on iPhone or on Android, here is the way.
Step 1. Open the Facebook app and go to Settings & privacy.

Step 2. Under Account settings, tap on Account Ownership & Control.
Step 3. Select Deactivation and Deletion, choose Deactivate Account, and complete the deactivation steps for Facebook.

Step 4. Open the Messenger app and head to the settings menu (your profile icon at the top left).
Step 5. Scroll down and tap on Legal & Policies.
Step 6. Select Deactivate Messenger and confirm by entering your password.
Step 1. Log in to Facebook using a web browser. Navigate to Settings & privacy.

Step 2. Click Account Ownership & Control, choose Deactivation and Deletion, and follow the steps to deactivate your Facebook account.

Step 3. Open Messenger via the web or desktop app. Go to your profile settings and select Legal & Policies.
Step 4. Choose Deactivate Messenger and confirm your action by entering your password.
See? You successfully solved the issue of how to deactivate FB Messenger with just a few clicks!
What’s the most important thing when surfing on the internet? Privacy, privacy and always privacy. That’s why people want to figure out how to deactivate Facebook Messenger account. Although deactivating Messenger is a good step toward reclaiming privacy, your online privacy concerns go beyond social media. Apps like Facebook Messenger collect a significant amount of user data, especially over public or unsecured Wi-Fi networks.
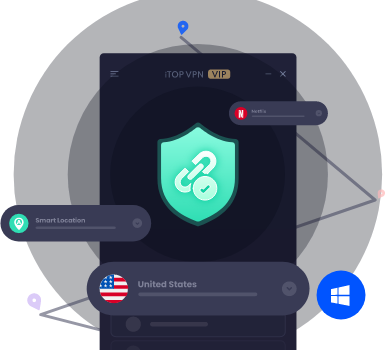

That’s where tools like iTop VPN come in. iTop VPN provides advanced features to protect your online activity while maintaining convenience for apps like Messenger:
IP Address Masking: Safeguard your online privacy by hiding IP address so your activities remain completely anonymous. This means no one can easily see or follow what are you doing on the internet.
Military-Grade Encryption: Protect your data with cutting-edge encryption standards used by military and governmental agencies. So obviously, this technology will nearly 100% keep your personal info safe from hackers, viruses, and other online dangers.
Bypass Geo-Restrictions: Break through geographic barriers with its global network of their free VPN servers and access your favorite content or online services from anywhere in the world. Say goodbye to location-based restrictions and hello to global online freedom.
Ad and Tracker Blocker: Still bothered by various ads on the internet? Try iTop VPN. It eliminates intrusive ads and stops trackers from monitoring your online behavior. This feature can stop annoying stuff so you can surf on the internet faster and keep things more private.
Kill Switch Feature: If you're looking into how to deactivate FB Messenger for privacy reasons, features like the kill switch ensure your sensitive data is never at risk. It automatically cuts off your internet if the VPN connection drops, keeping your personal information secure.
Safe Access on Public Wi-Fi: Browse confidently on public networks, such as cafes, airports, or hotels, without the fear of cybercriminals intercepting your data. As one of the best free VPN for Windows, iTop VPN ensures robust protection no matter where you're connected.
No-Log Policy: Enjoy complete peace of mind knowing that none of your online activities are recorded. With a strict no-log policy, your browsing history, personal information, and digital interactions remain private.
As a reliable speed VPN, iTop VPN not only can solve the problem about how to deactivate FB Messenger, it also can protect your privacy when you use Facebook Messenger. Let’s see the step-by-step guide.
Step 1. Download and install iTop VPN from the official website.
Step 2. Open the app and choose a server from its list of VPN servers based on your location or needs.

Step 3. Click on the connect button to establish a secure connection.

Step 4. With iTop VPN activated, launch Facebook Messenger and use it confidently knowing that your data is protected.
1. What happens after you deactivate Messenger?
Before you find out how to deactivate FB Messenger, you should know once deactivation, your Messenger chat history remains visible to contacts, but you won’t be able to send or receive messages until you reactivate.
2. How to reactivate Messenger?
Reactivation is easy. Simply log back into the Messenger app or log in to your Facebook account. Your settings will be restored.
3. Can I deactivate Messenger without deactivating Facebook?
If you want to know how to deactivate Facebook Messenger without deactivating Facebook, unfortunately, you can’t. Messenger can only be deactivated after deactivating your Facebook account.
4. Will my contacts know I’ve deactivated Messenger?
Your contacts won’t receive any notification. However, they’ll see your account as inactive if they try to message you.
5. What are the alternatives to Facebook Messenger deactivation?
If you’re not ready to deactivate, consider taking a break by turning off notifications in the app or muting conversations. For enhanced privacy, use tools like free VPN iTop VPN to secure your data while online.
Final Words
How to deactivate FB Messenger may seem challenging at first, but with this guide, the process is simple and straightforward. No matter if you’re trying to focus, stay private, or set some limits, doing this can make your day a lot easier. For added security, we highly recommend using iTop VPN, a dedicated IP VPN to safeguard your online activity. So I'm sure you must have a solution for the question at the very beginning about how can I deactivate Facebook Messenger account right? Then why don’t you make the first step with iTop VPN from today?

Step-by-Step Tutorial to Fix Facebook Dating Not Working & Free Facebook Dating VPN for Easier Location Change
Cheapest Country for Facebook Ads: Maximize Your ROI with Low-Cost Markets

How to Fix Facebook Secret Conversation Data Leaking? - Best Way in 2026

Best Free Facebook VPN to Unblock & Access FB Easily and Quickly
10+ dedicated social app servers
Unblock your favorite apps
Encrypt and protect data
Subscribe to Our Newsletter
Subscribe to our newsletter to stay updated every moment.
Subscribe to Our Newsletter
Subscribe to our newsletter to stay updated every moment.
© 2026 iTop. All rights reserved.


