
iTop VPN offers 3200+ VPN servers in 100+ locations worldwide to help you access various sites privately and safely, along with dedicated IP, dynamic and static IP, and Double VPN.
This post will give you step-by-step instructions about how to set up the VPN settings and the best VPN to use to connect to the secured network with no VPN settings.
The VPN refers to Virtual Private Network, is now a widely adopted internet security method in order to combat the increasing threat of malicious cyber-attack & hacking. A VPN will establish a secure, encrypted connection between your device and a private server. Additionally, VPN will encrypt your network traffic with a certain algorithm & turn your data into an unreadable string. In summary, a trusted VPN service with good VPN settings can practically protect your data security.

In addition to their security benefits, VPNs can come in handy when you’re trying to access regionally blocked content. For example, if you’re traveling in the United Kingdom and want to stream Netflix titles only allowed in the US like Inception, Lord of the Rings. A VPN with proper VPN settings could help you with it.
Thus, knowing how to use a VPN, then knowing the VPN settings, could benefit a lot from a good VPN service. But what are VPN settings? How to set up the VPN settings on Windows 10? Which best free VPN for Windows should we choose if we don't want to set up the complex VPN settings?
You can always connect to a VPN (a virtual private network) on your Windows PC to secure your internet connection. If you’ve ordered service from a VPN service provider, then a VPN connection can be more secure since you will connect to a private network rather than an exposed, public server. For example, when you work from a coffee shop or airport Wi-Fi, your privacies are very likely to be exposed since these public networks are compromised to the connectivity. Thus, setting up VPN settings in Windows 10 & connecting to a secured VPN service is undoubtedly a better choice. To make sure not to place your private information and anonymity at risk, you can try to set up the VPN setting on Windows by the following steps.

Step 1: In the lower right taskbar of your desktop, click the "Network" icon as shown in the figure below, and then click "Network and Internet Settings".

Step 2: In the network and Internet window, click "VPN" in the left column, and click "Add VPN Connection".

Step 3: The following figure shows the setting interface of the built-in VPN connection in Windows, and then it is time to set up the VPN connection.
If you are not subscribed to a VPN service, then you can follow the post below to use the VPN service provided by VPN Gate. The VPN Gate services are free but somehow not secure (a public project), the following parts will exhibit the steps of VPN settings. Atttention, if you are seeking for best free unlimited VPN for Windows, the VPN Gate isn't a proper option.

Step 1: Click into their server list page (www.vpngate.net/en/), you can see that your IP address is exposed when you are not connected to a VPN connection with correct VPN settings.

Step 2: Click the “Add a VPN connection” button under “VPN Settings”. Choose” Windows built-in” under “VPN provider”.

Step 3: On the server list of VPN Gate, you will see a protocol list where all supported VPN servers are listed. You can pick up the specific protocol you want by setting up the filter. For example, the author only checked L2TP/ After checking the IPsec VPN protocol, click "Update Server List".
Among almost all the VPN protocols are provided by VPN Gate, the only VPN types that comply with the Windows built-in VPN are "L2TP/IPsec" and "MS-SSTP". You can filter out these two kinds of VPN protocols on the VPN server list.

Step 4: Under the VPN setting on Windows 10, as shown in the following picture, your VPN connection is in the "Connection Name" field. Then fill the "Server Name or Address" field with the ISP hostname of your preferred VPN server offered by Tsukuba University. Then make sure you select the "VPN Type", then select the VPN protocol type you want to use. The VPN Gate's L2TP/IPsec protocol is recommended. For finishing the VPN setting, make sure "L2TP/IPsec (using a pre-shared key)" is chosen.

Step 5: A noticeable thing for the VPN service provided by VPN Gate is the "pre-shared key" must be entered in lowercase. Under the drop-down menu "Type of sign-in info", select "Username and Password"; The fill the "Username" and "Password" fields. Then check "Remember my login information” and click "Save" to complete the VPN settings.

Step 6: After everything has been set up, go to the VPN tab, click the “Connect” button, you may be able to connect to the Tsukuba University’s public VPN. If the VPN connection is failed, try other available server & proxy.
Need a VPN service which have free trial? Also read: >>8 Top VPNs for Windows Free Trial<<

As you’ve noticed, doing the VPN settings for the Windows 10 is very complex. First, you have to have common knowledge about computer networks. Second, you have to have a reliable VPN service provider that gives you the needed information like server name & address, Pre-shared key…etc. Is there a fast free VPN which reliable & without cumbersome VPN settings?
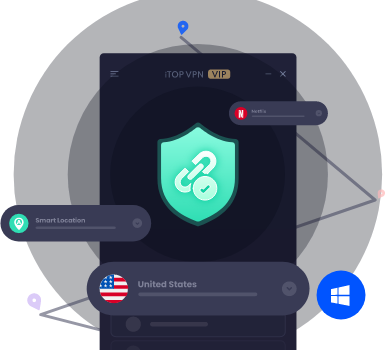
The iTop VPN is considered one of the greatest VPN for Windows which you don’t need to spend any of your time on it’s VPN settings. To connect to a secured network with iTop VPN you will only need to do one click.
Step 1. To begin with, just download the iTop VPN & install it. After the installing is finished, execute the application.
Step 2. You will see the main interface of the iTop VPN, to connect to the secured VPN network, click the round “Connect” button, iTop VPN will automatically optimize the VPN setting and connect you to a secure VPN network.

Step 3. If you need to access advanced security VPN settings, you should click “Privacy Protection.” Then you will find the security-enhancement protection VPN settings are listed. Including Adblocker, Split tunneling, kill switch & DNS protection, activating these VPN settings can significantly increase your internet security level.

Remember the unsecured Tsukuba VPN protocol and want a VPN service with free to use? The iTop VPN is the best free VPN for Windows which has no cumbersome VPN settings.

The iTop VPN offers 700 MB of free traffic per day – it will roll over every 24 hours. Theoretically, you will have more than 20 GB of free traffic per month. It is a good deal when compared to other VPN services. Part of advanced features need to upgrade to a premium account to unlock, it still considered a great deal to unlock its exciting features like further security protection, enhanced geo-spoofing, better internet identity masking…etc.
This post has introduced how to do the VPN settings in Windows 10, if you are seeking a better way that doesn’t need to configure & set up VPN settings, the iTop VPN could be the best choice for you!
10+ free servers in US, UK...
3200+ extensive servers
Dedicated IP addresses
Ad blocker and Proxy service
For Windows 11/10/8/7
Subscribe to Our Newsletter
Subscribe to our newsletter to stay updated every moment.
Subscribe to Our Newsletter
Subscribe to our newsletter to stay updated every moment.
© 2026 iTop. All rights reserved.


